Monday, December 19, 2011

Thumbprint Cookies


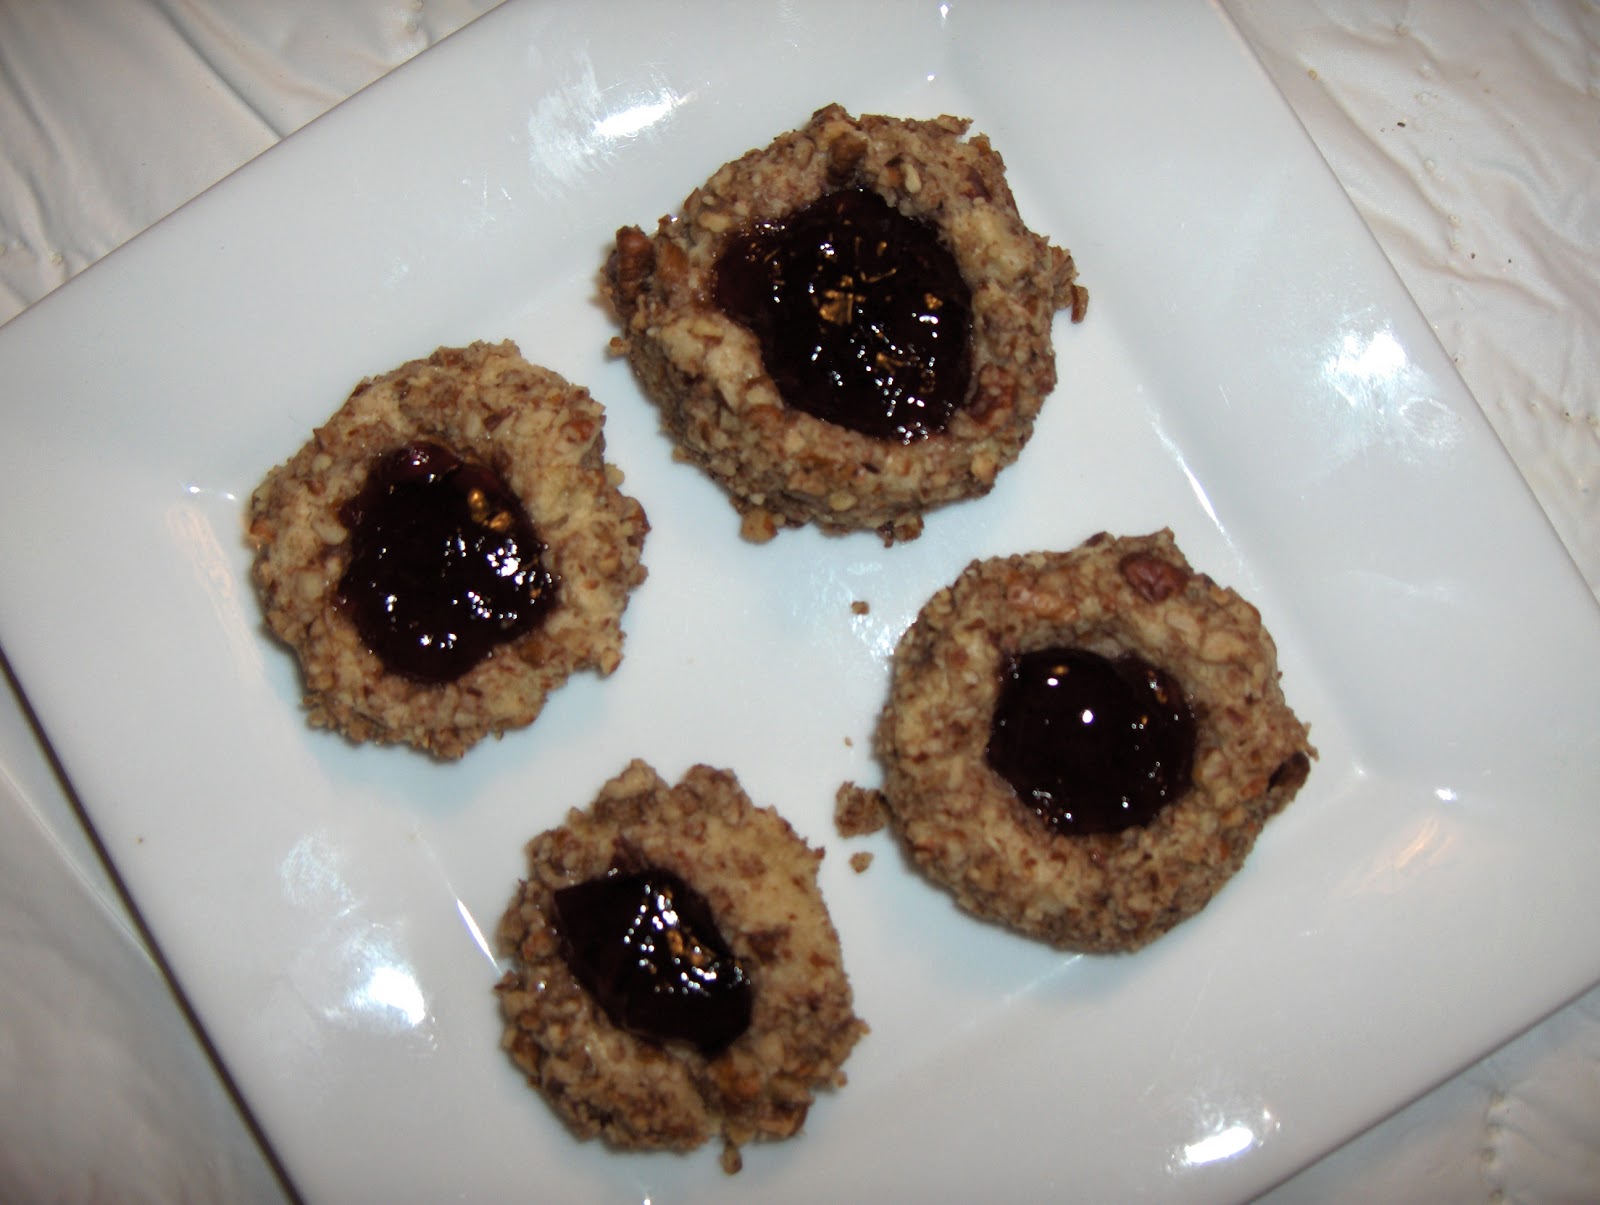
A nice traditional cookie that everyone seems to enjoy - a real hit. They are a little more labour intensive but worth the trouble.

Ingredients

1 1/2 cups butter
1 cup brown sugar
2 eggs, separated
2 tsp vanilla
2 2/3 cups all-purpose flour
3 cups finely chopped pecans
1 cup jam or jelly

Preheat oven to 350 degrees.  Cream butter and sugar.  Beat in egg yolks and vanilla.  Then add flour and mix well.  Shape into 1 1/2 balls.  You will have 4 to 5 dozen.


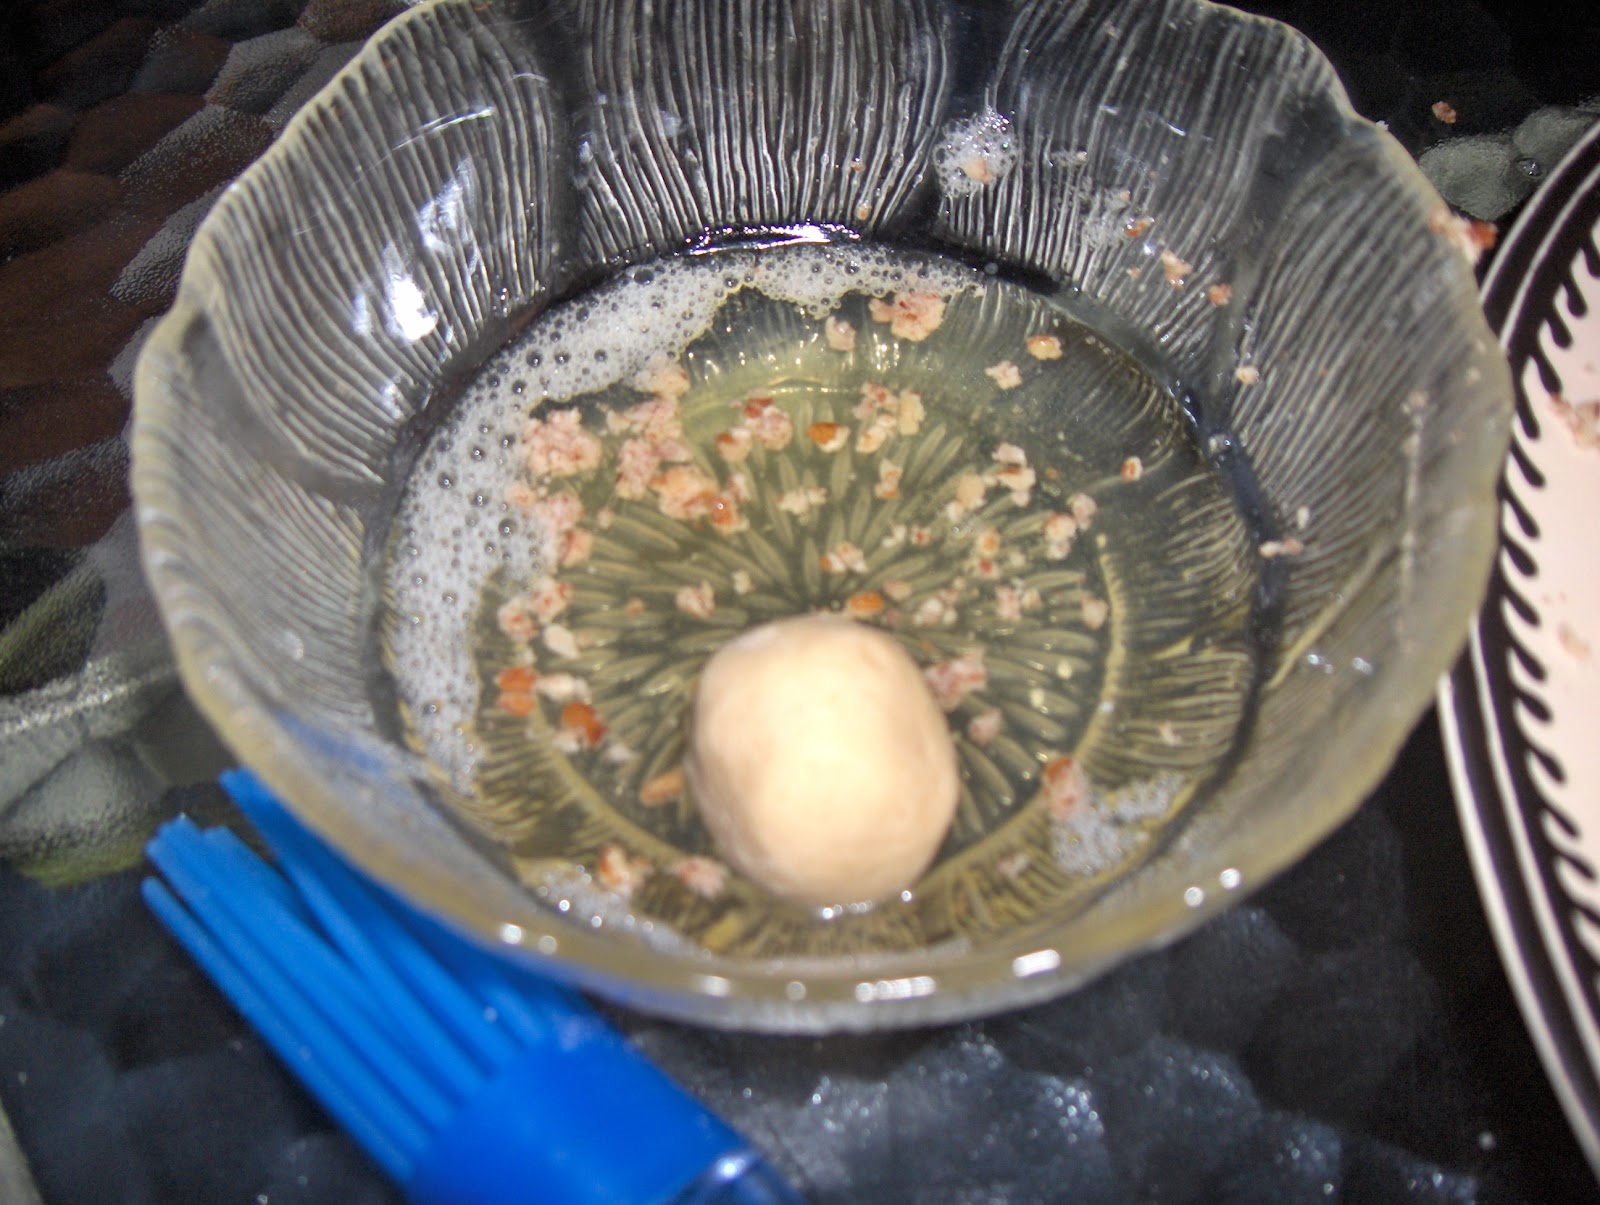
Whip the egg whites in a bowl until frothy.  Then drop each ball in egg whites and roll in nuts.


Place them 2 to 3 inches apart so they won't spread into each other.  Using your thumb (hence thumbprint), press a hole into the middle of each cookie.  Spoon a little jam into each cookie.  I used red currant jelly this time but I usually make it with seedless raspberry jam.  Use your favourite jam or jelly and you will enjoy them even more.


Bake 12 to 15 minutes until just browned around the edges and feeling slightly firm.  They are a delicate cookie but will be firmer when completely cooled.  These freeze well to but layer parchment or waxed paper between or pack in a single layer in freezer bags.  Merry Christmas - Joyeux Noel.

Almond Crescents

Christmas is almost here and I'm almost done my baking.  A little behind this year but everything will be ready soon.  This is the recipe for my favourite Christmas cookies - almond crescents.  I always used to give some to a friend of mine whose husband was from Greece.  He said they tasted just like ones his mother used to make and reminded him of home and childhood.


Ingredients

1 cup butter
2/3 cup of icing sugar (extra for rolling finished cookies)
1 tsp vanilla
1 tsp almond extract
1 cup coarsely chopped almonds
2 1/3 cups of all-purpose flour

Cream the butter and sugar together in your mixer until smooth.  Beat in vanilla, almond extract and the almonds.  Then beat in the flour until well mixed.  It will look at bit crumbly.  Preheat oven to 350 degrees.


Roll some of the dough out and cut pieces about 2 inches long.  Form them into crescents and place on a parchment lined cookie sheet.  You will able to make about 3 dozen.


Bake about 15 minutes or until lightly browned.  Let cool on a rack.  Then pour some more icing sugar in a cereal sized bowl.  Gently roll each cookie in the icing sugar.  They are the best cookies around and I guarantee you will enjoy them.  They freeze really well too.


Saturday, December 10, 2011

Caramel Pecan Bars


Yum!  This one of my favourite square recipes.  I don't know why but I only make it a Christmas so it always makes me think of the holidays!

Ingredients

Base:
2/3 cup of butter
1/3 cup of lightly packed brown sugar
2 cups of all purpose flour
1 beaten egg

Topping:
about 1 to 1 1/2 cups of whole pecans
3/4 cup of butter
1/2 cup of liquid honey
3/4 cup of lightly packed brown sugar
1/4 cup of whipping cream

Preheat your oven to 350 degrees.  Spray a 9 by 13 pan with non-stick spray.  Combine all the base ingredients in a food processor and then dump into your prepared pan.  Using the back of a spoon, press the base firmly into the pan.  Then bake it for 15 minutes.


I don't like to continue with the recipe until the base is out of the oven because you really need to move quickly once you are making the caramel.  So it's a good time to put your feet up and have a cup of tea.
Once the base is baked, place all the pecans (see below).


I like to line them up so you can cut the squares into pieces with a single pecan in each one.  In a heavy saucepan, melt the butter at low heat and add the honey.  Then add brown sugar and bring to a boil for 5 minutes while stirring constantly.  Boil on as low a temperature as possible so you don't scorch the butter or sugar.


Then take it off the heat and add the whipping cream. It will bubble up a lot so be prepared.  Stir until it settles down and it will be a lovely caramel colour.


Now spoon it gently over the pecans.  If you pour it over, all your pecans will "swim" away.  So spoon it gently and evenly and use a fork to move any pecans that shift.  Now put it in the oven very gently and bake for 15 minutes more.  When you take it out of the oven, it will still be runny.  Make sure you let it cool completely.  I either put it in the fridge or cover it well and leave it in the unheated sun room overnight.  Then you will be able to cut up the squares cleanly and store in the fridge or in the freezer until you are ready to eat them.  Now ask me if I followed my own advice ;)  Well not really, I had to cut a couple of squares just to taste.  The rest are cooling properly now.  I can give my seal of approval - they are delish.  Enjoy! Merry Christmas...

Minestrone Soup


I was baking today for Christmas so dinner was a nice homemade soup.  There are a lot of ingredients but it is very simple to make.

Ingredients

6 slices of pancetta
1 1/2 cup of chopped onion
2 carrots, peeled and chopped
1 celery stalk, sliced
2 garlic cloves, minced
8 leaves of Swiss chard, stem removed and sliced into shreds
1 large potato, peeled and cubed
half a large can of diced tomatoes
sprig of rosemary
1 can of white navy beans
1 large tetrapak of beef broth
rind of Parmesan cheese
3 Tbsp of fresh chopped parsley
salt and pepper


Cook the pancetta until crisp.  If you don't have pancetta, you can use about 4 slices of bacon but the pancetta tastes better.  Take the pancetta out and drain on a paper towel.


Into the fat, add the onion, celery, carrots and garlic.  Saute for about 10 minutes.  Break up the pancetta into the pot.  Then add Swiss chard (if you don't like Swiss chard, use any greens such as spinach) and potatoes and saute this for a couple of minutes.  Now add half a can of tomatoes with most of the juice.  Simmer for about 10 minutes.


While it is simmering, open and rinse your can of beans.  Put half them in the food processor with a little broth and process to a paste (I used a measuring cup and my hand blender as it's easier to clean).  This slurry is what you are going to use to thicken the soup.  So now add this to the soup, in addition to the broth, your sprig of fresh rosemary and the rind from a piece of Parmesan.  If you don't have the Parmesan, you can omit it but it adds a rich and salty flavour to the soup.  I always like to save rinds for something like this.


Now let the soup simmer until the veg are tender.  Once it is done, remove the rosemary stalk and Parmesan rind.  Add the beans and parsley and heat through.  Season with salt and pepper but taste the soup first.  Pancetta and Parmesan can make it salty so I didn't add any salt.  This recipe is going to feed about 6 and is a really nice hearty soup.  Something I really appreciate on these cold winter days.  I hope you enjoy it..

Wednesday, December 7, 2011

Swiss Steak


This was one of my favourite meals when I was a child.  I remember my mother always used to make this on Friday nights when my sister and her husband were coming from Toronto for the weekend.

It is simple to make and holds well in the oven if you aren't sure when your guests are arriving.  I've also put leftovers away in the freezer for a "TV" dinner on a night I don't feel like cooking.


Ingredients

2 lbs of round steak, cut into serving pieces
1 green pepper, cut into chunks
1 medium sweet onions, thickly sliced
2 cups of sliced mushrooms
1 clove of garlic, minced
1/2 cup flour
salt and pepper
1 tsp dry mustard
1/4 cup shortening or a good oil
1/4 cup ketchup
2 cups of beef broth

Preheat the oven to 325 degrees.  Start by chopping veg, melt a tsp of shortening and saute the veg on medium.  Once the veg are softened, spoon them out onto another plate.  Pound the steak with a meat mallet.  (That's my Mom helping out)


Mix the flour with the dry mustard and season with salt and pepper.  Dredge the meat in the flour and brown in batches in a little more fat.


Once the meat is all browned, deglaze the pan with the beef broth.  Add the ketchup and stir well to mix.  Turn the heat off and return the meat to the pan.  Layer the vegetables over the meat and broth.  Cover with a lid and bake for at least one and half hours.  Serve with creamed potatoes and another vegetable if you'd like.  I hope you enjoy this family recipe - it always makes me think of childhood.

Chocolate Covered Peanut Butter Balls


This one of my favourite Christmas treats - they taste like peanut butter cup chocolate bars.  A little messy to make but really worth it!


Ingredients

3/4 cup butter (do not substitute margarine)
3 1/2 cups of  icing sugar
1 cup smooth peanut butter
1 Tbsp milk
1/2 tsp vanilla
2 to 3 cups of chocolate coating wafers


Microwave the butter in a mixing bowl until it is melted.  Add the icing sugar and mix with a hand mixer...


Then add peanut butter, milk and vanilla...


Mix well and then form into one inch balls...


Add this point, you need to put cookie sheet into the freezer for 30 minutes...


Using a double boiler, melt the chocolate.  I use a spoon to toss the ball in the chocolate and take it out with a fork.  That way, the excess chocolate will drip off.  Once they are all dipped, put the parchment lined cookie sheet back in the freezer.  After about an hour, transfer the balls to a container with the parchment between the layers.  Make sure you refrigerate or freeze these as they have butter and milk in them.  Great for Christmas gift giving or a cookie exchange.  Enjoy!

White Chocolate Puddles


The easiest Christmas treat ever...I used white chocolate chips and dried cranberries and pistachios.


You can use chocolate chips if you prefer and any dried fruit or nuts.  I just prefer the colours - white, red and green for Christmas.  Using a double boiler so the chocolate doesn't scorch (I use a pot with some boiling water and a metal boil that fits over it), melt the chocolate.


Once it is melted, spread spoonfuls onto a parchment lined cookie sheet.   Sprinkle nuts and fruit on top.  Then put your pan into freezer until they are solid.  Store these in freezer and enjoy them for the next few weeks.

Tuesday, December 6, 2011

Cocoa-Oat Delites


I am finally getting around to starting my Christmas baking.  I've been redecorating my kitchen so my baking has been put on the back burner  (lol - ok, not quitting my day job, I know).  This a easy recipe that my sister Connie gave me.  It tastes great - very chocolaty with chewy coconut.  You make it on top of  the stove and then freeze it.  How easy is that?


Ingredients

2 cups of white sugar
6 Tbsp of cocoa
1/2 cup of  butter
1/2 cup of milk
1/2 tsp vanilla
1 cup of sweetened coconut
3 cups of rolled oats (not instant)

It is a good idea to measure out your ingredients because this goes quite quickly once you start.  Using a large saucepan, I melt the butter on medium heat while I measure the rest.  I put the sugar and cocoa in one measuring cup, the milk goes into another and the oats and coconut get measured out in my largest measuring cup.  It is also handy to line about 3 cookie sheets with parchment paper before you begin.

Once the butter is melted (don't scrimp here - it's only 1/2 cup and this recipe makes about 3 dozen cookies), add the sugar, cocoa and milk and stir to mix.  After it is well mixed, turn up the heat and bring the chocolate mixture to a boil.


Quickly add the vanilla and take off the heat.  Quickly stir in oats and coconut.


Drop spoonfuls of the mixture on the cookie sheets (I like to use a melon baller to make little ones but I also used two teaspoons today to make bigger ones).  You need to work quickly because as the mixture cools down, it is harder to manipulate.  Freeze your cookies for an hour or so.  Once they are firm, you can store them in a container in the fridge or freezer.  I prefer to store my in the freezer.  They will keep well up to a month and only need to be taken out for 10 or 15 minutes before serving.  Enjoy and stay tuned for peanut butter balls (the next Christmas recipe).


Sunday, December 4, 2011

Polynesian Meatballs


Tonight's dinner was Polynesian Meatballs with rice.  Fast, easy and kid-friendly...see ingredients below...


I start by making the meatballs - preheat oven to 350 degrees - mix ground beef (a couple of pounds) with a couple of Tablespoons of finely chopped onion and season with salt and pepper.  Form small bite-sized meatballs and place them on a parchment lined baking sheet (make sure it has a rim).  They need to bake about 20 minutes.  No extra fat required so much healthier than frying and they taste better!  A parchment lined sheet makes clean up easier too.


While your meatballs are baking, start your rice cooking.  Just follow the directions on the package.  Then chop up half an onion and one green pepper into large but bite-sized pieces.  Set aside and finely chop 2 large cloves of garlic and about an inch of fresh ginger root.


In a large pan, next you make the sauce.  Mix one cup of water, 1/4 cup of white vinegar, 2 Tbsp of cornstarch, 6 Tbsp of brown sugar, 1/4 tsp dry mustard and 1/2 tsp salt.  Whisk to mix well - especially the cornstarch.  Turn heat on to medium and add 2 Tbsp of soy sauce, 6 Tbsp of  ketchup and a 14 oz can of pineapple with the juice (I like to buy the rings and cut them into large chunks myself).  Stir to mix well.  The cornstarch will start to thicken the sauce. 


Add the vegetables and the meatballs.  Stir gently to mix and simmer for about 20 minutes to cook the veg.  Stir every 5 minutes or so. 


Spoon over rice and serve.  This recipe makes 4 servings and took me about an hour start to finish.  It could easily be made after work, it tastes great warmed up the next day and this recipe appeals to kids.  Enjoy!

Sunday, November 20, 2011

Chicken Quesadillas


Tonight I decided to make chicken quesadillas for dinner.  I've never made them before and I didn't have a recipe so I just winged it.  They tasted pretty good but they weren't pretty!


For 2 servings, I used one boneless chicken breast, one small pepper and half a medium sweet onion.  I started by slicing up the onion and pepper and cooked it in a little olive oil seasoned with some salt and pepper.  I set that aside in a bowl and added another couple of tsp of olive oil to the pan.  I stirred a tsp of taco seasoning into the oil and stir fried the chicken pieces.  I felt it needed a little brightening so I squeezed half a lime into the pan when the chicken was almost done.


I grated some cheddar cheese (It was good but next time I think I'd use Jack or a cheese that had jalapeno added to it for extra flavour).  In a clean pan, I added a little olive oil and placed a soft taco in the pan, next a sprinkling of cheese, half of the chicken, onions and peppers, topped with another sprinkle of cheese and another soft taco.  Cook until cheese melts and taco is browned.  This time I cooked it a little too long but next time, I'll keep a closer eye on it.  Serve with a little salsa and sour cream and enjoy!

Stay tuned cause I'm going to start my Christmas baking soon...

Wednesday, November 2, 2011

Creamy Fettuccine with Chicken and Mushrooms


Tonight I made pasta for dinner - a fettuccine with chicken and mushrooms in a creamy wine sauce.  It was very quick, about a half an hour to make, and scrumptious.  The recipe feeds 4 but tastes great for lunch the next day.

Here's the ingredients...


2 boneless, skinless chicken breasts, cut into strips
1 Tbsp olive oil
1 Tbsp butter
2 slices of bacon, cut into pieces
2 cloves of garlic, minced
1 pkg of mushrooms, sliced
1/2 cup white wine
3/4 cup cream
3 green onions, chopped
1 Tbsp flour or cornstarch
2 Tbsp water
salt and pepper
pkg of fresh pasta
grated Parmesan

Start by boiling water in a pot and heating oil and butter in a large frypan.  Add chicken to the pan and brown lightly, then add bacon and cook til crisp. Add the garlic and mushrooms and cook for a few minutes.  You probably need to add your pasta to the pot right about now.


Once the mushrooms are starting to brown, add the wine and boil til it is reduced by half.  Add the cream and bring it to a boil.


Then add the green onions...


Then mix your flour and water and add to pan to thicken.  Stir til it starts to form a thick sauce.  Add your drained pasta and toss to coat with the sauce.  Serve it with sprinkled Parmesan cheese..Enjoy!